 YouTube Deep Summary
![]() Extract content that makes a tangible impact on your life
Extract content that makes a tangible impact on your life
🤖 AI-Generated Summary:
Getting Started with DNA Design in the Exonic Studio Competition
If you're interested in DNA design and want to dive into an exciting competition, Exonic Studio offers a fantastic platform to get started quickly. In this post, we'll walk you through a super quick start guide on how to use the tools provided inside Exonic Studio to participate in the DNA design competition, optimize sequences, and validate your designs.
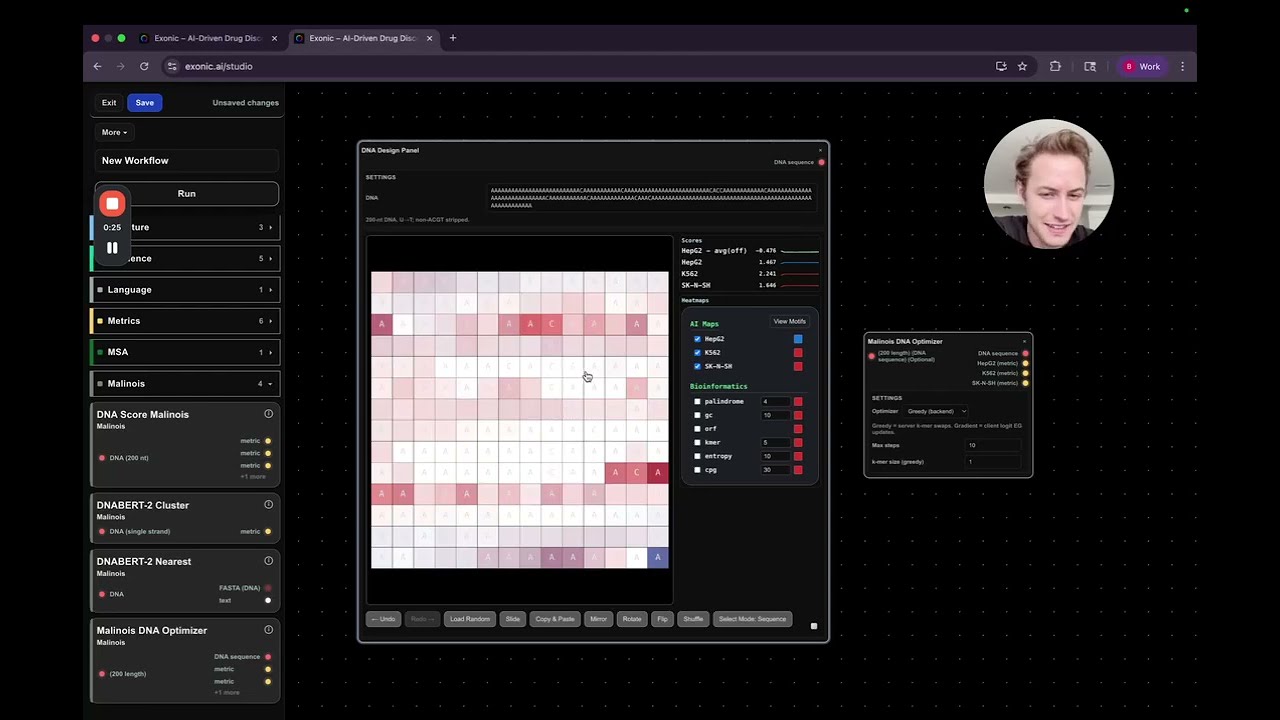
Exploring the DNA Design Panel
The first tool you'll encounter is the DNA Design Panel. This is a hands-on, user-friendly interface where you can manually manipulate DNA sequences. Key features include:
- Copy and Paste DNA Regions: Easily copy segments of DNA and paste them to create new sequences.
- Randomization: Quickly randomize your DNA sequence to explore different variants.
- Selection Modes: Choose between grid mode or traditional sequence mode to select and edit your DNA.
- Visual Layout: The DNA is displayed in a wrapped left-to-right format, making it intuitive to view and edit.
This panel is perfect for experimenting with DNA sequences and making targeted changes.
Using the Malinosis DNA Optimizer
On the right side of the interface, you'll find the Malinosis DNA Optimizer. This tool leverages a model from a recent research paper, which sets a benchmark for the competition. The optimizer offers two main approaches:
- Greedy Optimizer: This method randomly flips base pairs to incrementally improve the score.
- Gradient-Based Method: A more sophisticated approach that uses gradients to optimize the sequence in a controlled manner.
Running the Gradient-Based Optimization
To use the gradient-based method:
- Set the KL clamp parameter to control how much the sequence can change in each optimization step. Increasing this value allows larger changes.
- Choose the number of steps to run (e.g., 30 steps).
- Run the optimizer.
This method quickly generates optimized sequences. For example, after running it, you might see a strong score on the target cell line HEP G2 and good off-target scores, indicating specificity.
Balancing Scores and Real-World Validation
One key insight from the competition is that achieving a very high score on the Malinosis model isn't the only goal. Some sequences may score exceptionally high but could be overly optimistic or unrealistic for wet lab validation. The challenge lies in balancing:
- High on-target activity (e.g., HEP G2 activation)
- Low off-target effects
- Design cleverness that translates to practical success
Fine-Tuning Sequences in the DNA Design Panel
After generating an optimized sequence, you can:
- Paste it into the DNA Design Panel.
- Visualize where the model predicts high activity and off-target effects using heatmaps.
- Manually flip base pairs to reduce off-target activation.
- Incorporate known DNA motifs that enhance target activity.
This iterative process allows you to combine computational optimization with human intuition.
Submitting Your Design
Once satisfied with your sequence:
- Copy and paste it into the submission panel.
- Run the internal model pipeline to evaluate your design.
- Review the scores and various metrics provided.
This feedback loop helps you refine your approach and improve future designs.
Conclusion
Exonic Studio provides a powerful, interactive environment to design and optimize DNA sequences for a cutting-edge competition. By combining manual design with automated optimization tools like the Malinosis DNA Optimizer, you can explore creative solutions and validate them computationally before moving to experimental phases.
Ready to start designing? Jump into Exonic Studio, experiment with the panels, and see how far your DNA designs can go!
Happy Designing!